This tutorial provides step-by-step instructions for creating a custom ecommerce site with online credit card processing functionality, using eZ publish.
Through this tutorial, I’ll explain how to:
- set up different product categories
- publish products
- create custom product structures
- use custom templates for product pages
- extend the checkout process
- integrate the site with online payment gateways
No programming experience is needed, though you may need the help of a friendly sysadmin to install eZ publish. You can also use the eZ publish LiveCD to follow this tutorial.
Requirements
In order to follow this tutorial, you’ll need:
- Apache Web server
- PHP, version 4.3.4 or greater
- A modern relational database, such as MySQL, version 3.23.x or greater, or PostgreSQL, version 7.3 or greater.
- System administration skills, or the services of the Web server’s sysadmin
Installation
To get an online business running with eZ publish you first need to have the application installed. You can find complete installation documentation on the ez.no Website.
Setup
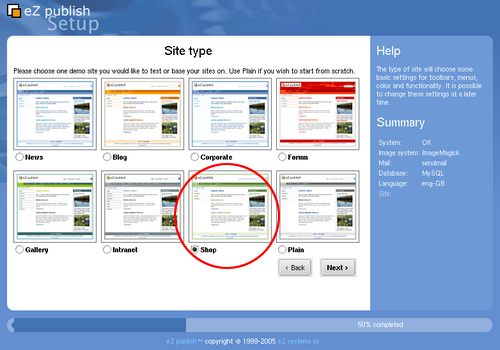
After installation, you must run the Web-based setup wizard in order to configure your installation of eZ publish.
When the setup wizard asks you to choose a “site type”, select “shop”, as shown below.
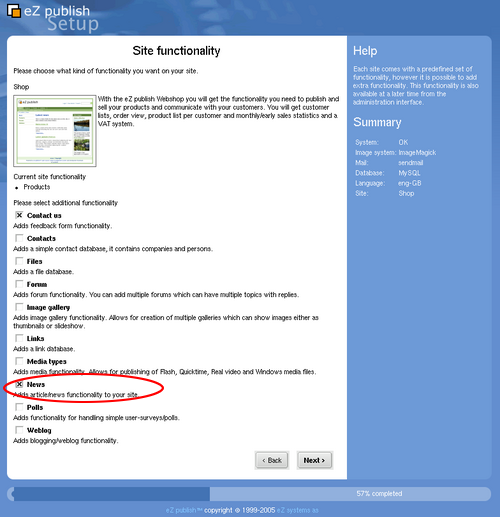
After selecting the site type, you’re asked to choose the site’s functionality. Select “News” in addition to the functions already suggested. The site functionality options define the kinds of content you can publish on your site; you can change your selections after installation if you wish. Here’s the configuration screen.
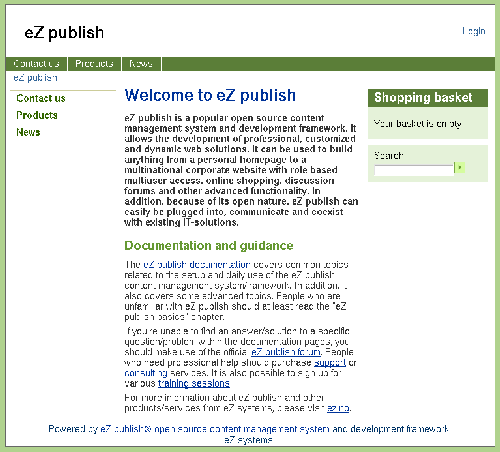
The screenshot below shows what the default eZ publish shop configuration looks like after setup.
Customization
Once eZ publish is installed, you’re ready to begin customizing the Website.
The default setup for an eZ publish ecommerce site includes the basic features of an online store, including:
- catalogue (including features like lists of new products and most popular products)
- shopping cart
- search functionality
Our first customization is to change the look and feel of the site to a more appropriate design. For the purpose of this tutorial, you might like to use the standard red “Theme 8” that’s bundled with eZ publish, or you may wish to download additional themes. By default, the menus in eZ publish are shown both at the top and on the left-hand side of a page. We can change this to create a double-level top menu, which contains our navigation in two levels at the top of the screen.
Another useful change is to make the lists of new products and most popular products display on all pages, instead of just on the product pages.
Information on how you can change theme and adjust the menus and tool bars is covered in the SitePoint article titled, Build a WebDav-Enabled Intranet with eZ publish. To learn more about how to change the design with eZ publish, try the article Build Table-less CSS Layouts with eZ publish.
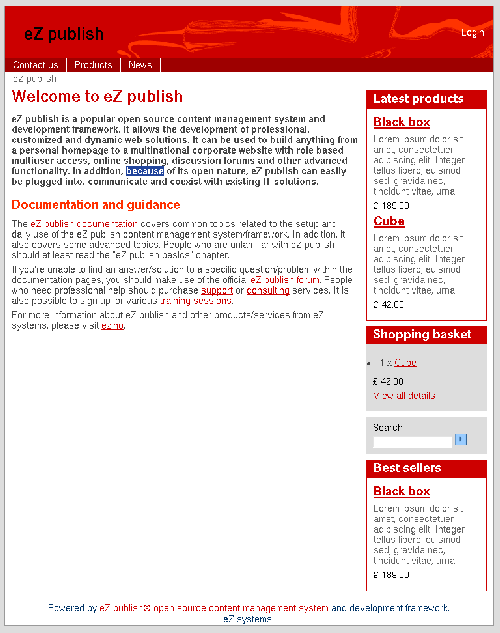
With these customizations in place, the Web site looks like the screenshot shown below.
Shopping
Now that we have installed and configured the basic eZ publish installation, we can test-drive it: let’s shop for a product.
For the moment, we’ll use one of the products that already exists in the installation. Test the shopping process by following these steps:
- Choose the “Black Box” product from the “Latest products” list
- Click “Add to basket”
- Click “Checkout”
- Fill inn account information including name, email and address details
- Click “Continue”
- Click “Confirm” and the order is completed
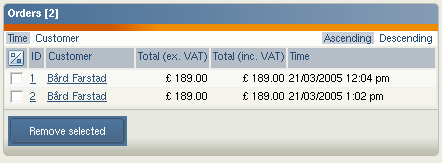
To verify that the order was successfully completed, go to the administration interface and look at the order list, which you can access by clicking on the Webshop tab in the administration interface. The screenshot below shows the order list with two completed orders.
Adding New Products
Shopping for test products is okay, but you’re probably more interested in getting your own products into the store. To add a new product, go to the administration interface and:
- Click on the “Content structure” tab in the administration interface
- Click on the “Products” folder in the left-hand menu
- Select “Product” in dropdown at the bottom of the product list (as shown in screenshot below)

You will be presented with the product edit screen. Fill in the necessary fields and click on the “Send for publishing” button. Your product is now instantly available from the Website — and is shoppable! You can find it in the products folder, and in the Latest Products list. You can also search for it, as all content in eZ publish is automatically indexed by the built-in search engine.
Custom Products
Most online stores need to accommodate products that have more properties than are available in eZ publish’s standard product type. To accommodate a custom type of product, we will create a new content class called “My Product”; this will form a base type for products that have additional properties. To do this:
- Go to the “Setup” tab in the administration interface
- Click “Classes” in the left hand menu
- Click the “Content” class group
- Click the “New class” button
- Enter the name “My Product” as class name
- Add your desired class attributes
- Click the “OK” button
An eZ publish class is basically a list of defined attributes. Each attribute can hold information in a specific format, for example, text, XML, an image or a price.
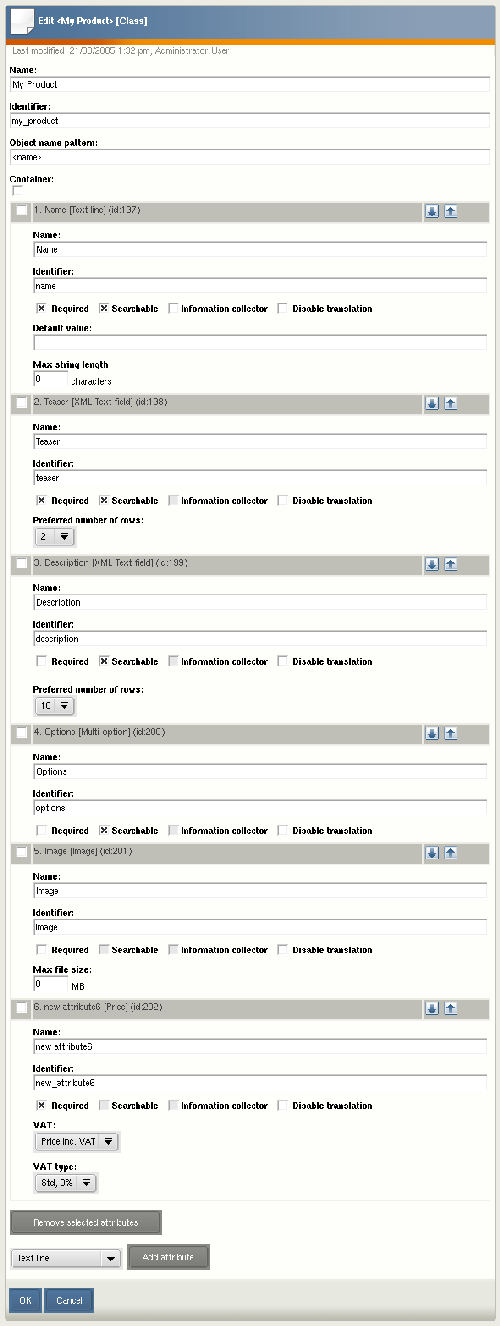
Below is a screenshot of the class edit screen once you’ve added and filled in all the extra attributes. At the bottom of the class edit screen, you’ll see a dropdown for selecting datatypes. You can add a datatype as an attribute: select the appropriate datatype, then click the “Add Attribute” button. Using this tool, you can customize the content model to fit your exact needs. When you have added all your desired attributes, click the “OK” button to save your class definition.
Add the following attributes to the class:
- Title (Text line)
- Teaser (XML text)
- Description (XML text)
- Options (Multioption)
- Image (Image)
- Price (Price)
Publish a Custom Product
Now that we have created a “My Product” product definition, we can create products of this type. To do so, go to the “Content Structure” tab in the administration interface, select “My Product”, then proceed as you did above to create a product.
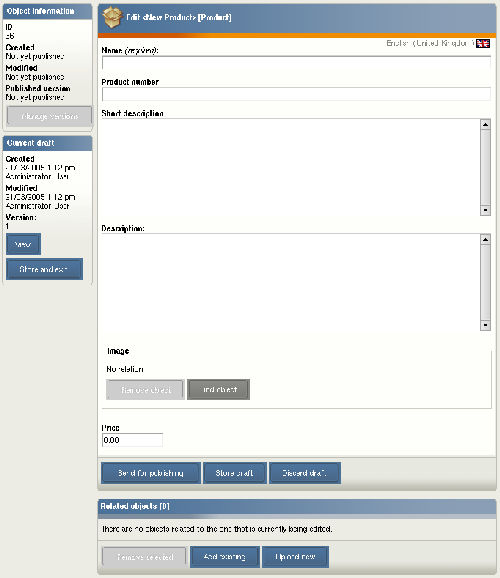
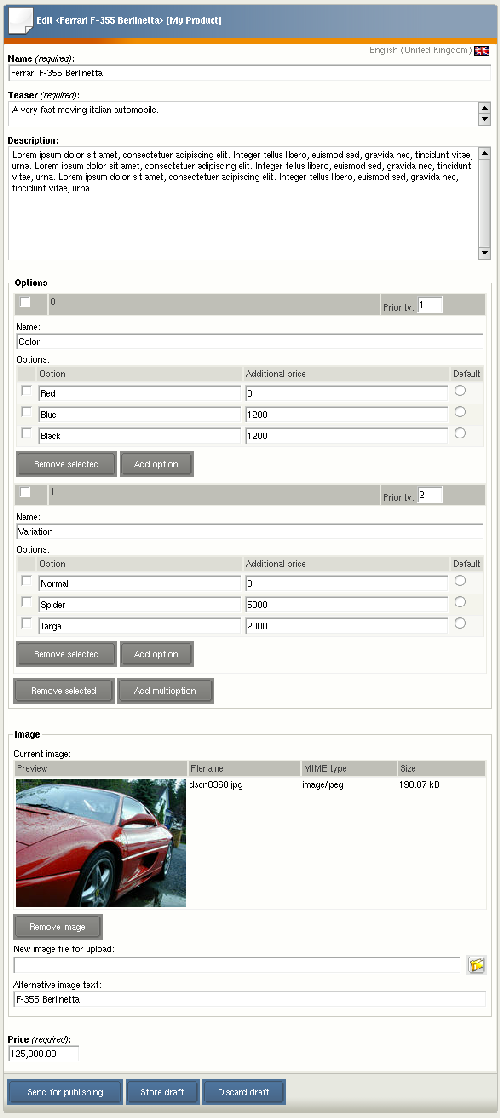
The screenshot below shows the edit screen for our new product. It’s very similar to the standard product edit screen we saw earlier, but notice that you now have the possibility to fill in additional product options. Since we added an attribute of the type multioption, we can add one or more options to our product. Options are used to sell variations of a product at a different price. As usual, press the “Send for publishing” button to publish the product.
Custom Look and Feel
If you view your Website now, you’ll see that the new product is already available. Since we added a price attribute to the product, it’s already shoppable. You can add the product to your cart and complete the shopping process.
One problem is that the product doesn’t look very nice within the default template, which basically just lists the available attributes. To make the product fit the Website profile, we need to create a custom template for products of the class “My Product”.
To create a custom template, go to the administration interface and:
- Click on the “Design” tab
- Select “Templates” from the left menu
- Select “/node/view/full.tpl” from the “Most common templates” list
- Click the “New override” button
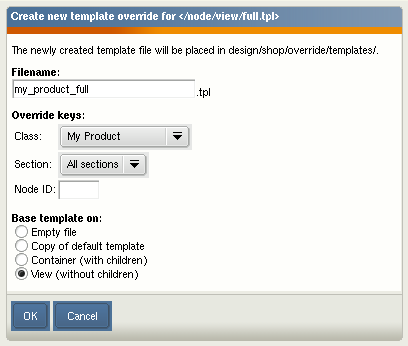
- Enter the name “my_product_full”
- Select “My product” as the class override key
- Select the “View” template
We’ve now created a new override template for the full view of the product. Note that every piece of content — search results, product lists, right-hand toolbar list, and so on — can be displayed in different ways. The full view is the default view for the display of any object.
The screenshot below shows the Override edit page with the correct values filled in. After you click the “OK” button on this screen, eZ publish generates a template file which can be edited either with a normal text editor, or via the eZ publish administration interface.
The Template Override list page displays the list of all the existing override templates for the full product view. Our newly created template will appear at the end of this list. Click on the Edit icon on the right-hand side of this list, and you’ll see the template edit screen shown below.
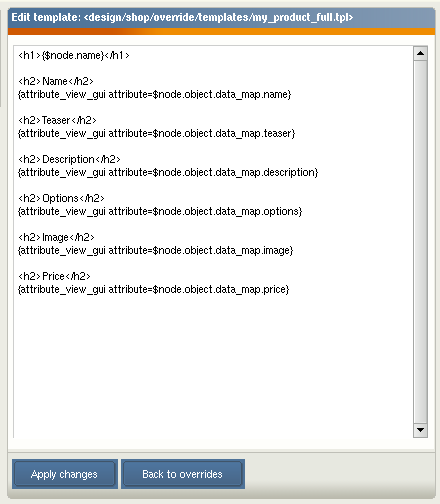
To make our product page more pleasing, we edit the template used to display it. In this example, I used the code shown below. I start the template by showing the product’s title in <h1> tags. The image is right-aligned using a <div> tag with the class "imageright". The three attributes — teaser, description and options — are then listed after one another. The price is rendered using the <h2> header tag. The last part of our template is the form that shows the “Add To Basket” button.
<h1>{$node.name}</h1>
<div class="imageright">
{attribute_view_gui attribute=$node.object.data_map.image}
</div>
{attribute_view_gui attribute=$node.object.data_map.teaser}
{attribute_view_gui attribute=$node.object.data_map.description}
{attribute_view_gui attribute=$node.object.data_map.options}
<h2>{attribute_view_gui attribute=$node.object.data_map.price}</h2>
<form method="post" action={"content/action"|ezurl}>
<input type="submit" class="defaultbutton"
name="ActionAddToBasket"
value="{"Add to basket"|i18n("design/base")}" />
<input type="hidden" name="ContentNodeID" value="{$node.node_id}" />
<input type="hidden" name="ContentObjectID" value="{$node.object.id}" />
<input type="hidden" name="ViewMode" value="full" />
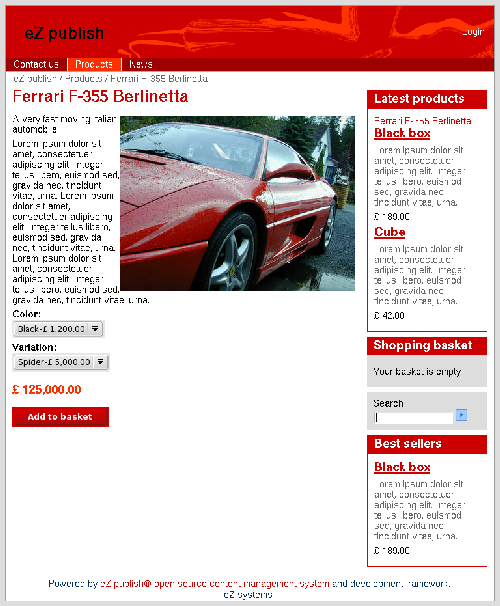
</form>When we view the product using our newly created template, it appears as shown below.
The Checkout Process
The shopping process in eZ publish is based on a workflow system. By default, it consists of these four basic steps:
- Basket
- User information
- Order confirmation
- Order view
However, you can extend the process with as many steps as you like, adding steps before and after order confirmation as required. The step that’s most commonly added before order confirmation provides users with the ability to select from a number of different shipping methods. Other steps can be inserted to request that shoppers provide additional information when buying particular products; for example, you might ask for the license holder’s name if you were selling licenses. Another step might allow you to show related products that the customer might also want to buy.
After order confirmation, we’d normally add credit card payment. But other integrations, such as sending the order information to another system upon order completion, or assigning the suer to a user group, could also be added. By assigning users to a specific user group as their orders are completed, you can create a shop that is able to sell, for example, content or software. Assigning a user to a group means that you can grant that user extra permissions, for example, permission to download restricted files or view restricted content for a limited period. The workflow consists of one or more workflow events. These workflow events are created via the plugin interface, using the PHP programming language, so you have the freedom to customize the shopping process in eZ publish.
PayPal credit card integration is bundled with eZ publish. Information on how to properly configure this extension is found in the eZ publish documentation.
Getting Help
That’s it! You have a fully functional, customised shopping cart, thanks to eZpublish. If, as you develop and customise the site, you need additional help, visit the eZ publish forums, where you can find assistance for the installation, configuration, customization and development of all your eZ publish solutions.
 Bård Farstad
Bård is one of the co-founders of eZ systems. He has been working professionally with CMS development since 1999 and have written many general purpose libraries like XML parser, SOAP library (client/server), and XML-RPC library (client/server). He is also one of the main developers of the eZ publish CMS. In his spare time he likes to play with his daughter, and play the guitar, and is also into aquascaping.


