In this article, I'm going to walk you through transformations in the canvas, as well as shadows and gradients. Transformations are an extremely valuable set of methods that allow you to start being creative with the way you draw objects on the canvas. Let's get started after the jump!
Setting Up
You're going to use the same HTML template from the previous articles, so open up your favourite editor and paste in the following code:
1 |
<!DOCTYPE html>
|
2 |
|
3 |
<html>
|
4 |
<head>
|
5 |
<title>Canvas from scratch</title> |
6 |
<meta charset="utf-8"> |
7 |
|
8 |
<script src="https://ajax.googleapis.com/ajax/libs/jquery/1/jquery.min.js"></script> |
9 |
|
10 |
<script>
|
11 |
$(document).ready(function() { |
12 |
var canvas = document.getElementById("myCanvas"); |
13 |
var ctx = canvas.getContext("2d"); |
14 |
});
|
15 |
</script>
|
16 |
</head>
|
17 |
|
18 |
<body>
|
19 |
<canvas id="myCanvas" width="500" height="500"> |
20 |
<!-- Insert fallback content here -->
|
21 |
</canvas>
|
22 |
</body>
|
23 |
</html>
|
Here we have nothing more than a basic HTML page with a canvas element and some JavaScript that runs after the DOM has loaded. Nothing crazy.
Translations in Action
Translate essentially shifts the entire coordinate system.
One of the simplest transformations in canvas is translate. This allows you to move the origin point of the 2d rendering context; the (0, 0) position on the canvas. Let me show you what this means.
First, place a square in canvas at the position (0, 0):
1 |
ctx.fillRect(0, 0, 100, 100); |
It will draw itself at the top left hand edge of the canvas. Still - nothing out of the ordinary here.


Now, try translating the 2d rendering context and drawing another square in the same position:
1 |
ctx.save(); |
2 |
ctx.translate(100, 100); |
3 |
ctx.fillStyle = "rgb(0, 0, 255)"; |
4 |
ctx.fillRect(0, 0, 100, 100); |
5 |
ctx.restore(); |
What do you think will happen? Have a gold star if you guessed that the new square will be drawn at the position (100, 100). No play time for those who guessed wrong. Sorry!

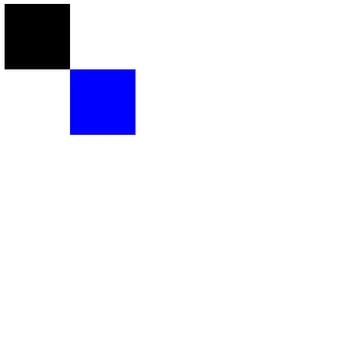
So what happened here then? As far as the code for drawing the second square is concerned, you drew it in the same place as the first square. The reason for this is that you basically shifted the entire coordinate system of the canvas so that its (0, 0) position is now at the place (100, 100).

Does it make a little more sense now? I hope so. It can take a little while to get your head around, but it's a simple concept once you understand it.
You probably wouldn't use this transformation too much on its own, as you could simply draw the second square at (100, 100) to get the same effect. The beauty of translate, though, is that you can combine it with other transformations to do some pretty cool things.
Let's take a look at the next transformation on the list.
Scaling Your Visuals
As you've probably guessed, the scale transformation is used for resizing. More specifically, the scale transformation is used to scale the 2d rendering context.
Remove the code that you worked on with the translate example, and add the following code:
1 |
ctx.fillRect(100, 100, 100, 100); |
This will draw a standard square at the position (100, 100), with a width and height of 100 pixels. So how do we scale this?


Properties in scale are multipliers for the x and y dimensions.
The scale transformation is used in a similar way to translate, in that it's called before you draw the objects that you want it to be applied to. It's important to point out that the properties in scale are multipliers for the x and y dimensions. This means that a scale of (1, 1) would multiply the size of the 2d rendering context by one, leaving it the same size it was before. A scale of (5, 5) would multiply the size of the 2d rendering context by five, making it five times larger than it was previously. Simple.
In your case you want to double the size of the square, so you apply a scale of (2, 2):
1 |
ctx.save(); |
2 |
ctx.scale(2, 2); |
3 |
ctx.fillRect(100, 100, 100, 100); |
4 |
ctx.restore(); |
Which results in a square that is two times the size:

However, notice how the square is now being drawn in a different position than it was being drawn before you applied scale. The reason for this is that scale multiplies the size of everything in the 2d rendering context, including coordinates. In your case, the position (100, 100) now becomes (200, 200); the coordinates are twice the size that they would be without being scaled.
To get around this, we can perform a translate that moves the origin of the 2d rendering context to the position that you want to draw the square. If you then apply scale and draw the square at position (0, 0), its position won't be shifted:
1 |
ctx.save(); |
2 |
ctx.translate(100, 100); |
3 |
ctx.scale(2, 2); |
4 |
ctx.fillRect(0, 0, 100, 100); |
5 |
ctx.restore(); |
Which results in a square that is twice as large as the original, but that is drawn at the same position as the original:


It's being aware of these little quirks in transformations that really helps when using them. Most of the common issues with transformations seems to be a result of not fully understanding how they work.
Rotating Elements
So far, all the transformations that you've dealt with have been pretty unexciting. Fortunately, the rotate transformation is here to save the day, and it's easily my favourite of the bunch.
I'm sure rotate needs no introduction, so let's jump right in and rotate a square 45 degrees (remember that degrees need to be in radians):
1 |
ctx.save(); |
2 |
ctx.rotate(Math.PI/4); // Rotate 45 degrees (in radians) |
3 |
ctx.fillRect(100, 100, 100, 100); |
4 |
ctx.restore(); |
Which positions a square at (100, 100) and rotates.. woah, hang on! This doesn't look right:

See what happened? The square seems to be trying to escape the browser window, rather than rotating on the spot at the position (100, 100). This is because rotate, like all the transformations, affects the entire 2d rendering context, and not objects individually.
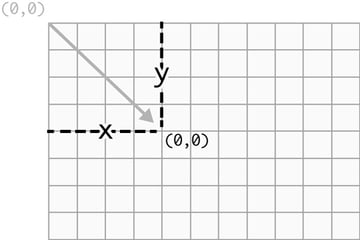
Here is an illustration of what happens to the coordinate system when you perform a 45 degree rotate:
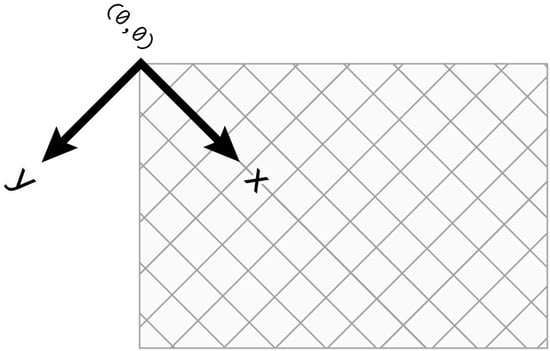
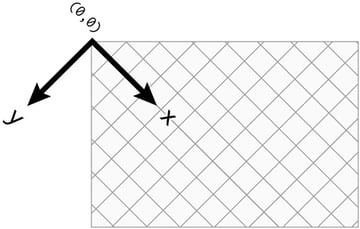
Notice how the entire coordinate system has rotated 45 degrees from the point of origin (0, 0)? This is what caused the square to look like it was escaping the browser window, simply because the position (100, 100) had been rotated slap bang on the edge of the browser.
The simple way to get around this issue is to combine rotate with translate, like so:
1 |
ctx.save(); |
2 |
ctx.translate(150, 150); // Translate to centre of square |
3 |
ctx.rotate(Math.PI/4); // Rotate 45 degrees |
4 |
ctx.fillRect(-50, -50, 100, 100); // Centre at the rotation point |
5 |
ctx.restore(); |
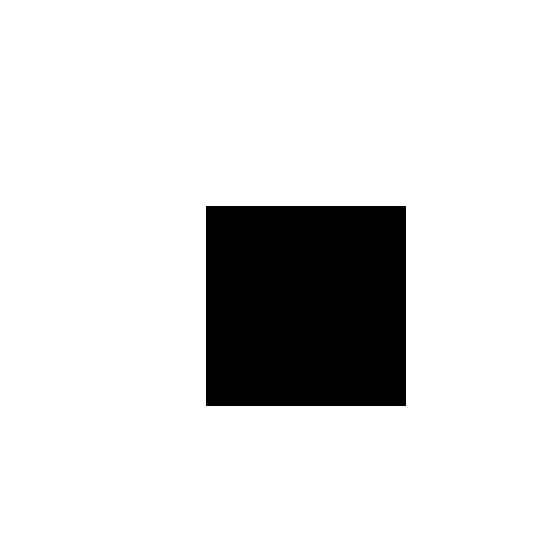
Performing the translate moves the origin point of the 2d rendering context (0, 0) to what should be the central point of the square (150, 150). This means that any rotation will now be based around the position (150, 150). If you then draw a square with a negative x and y position, equal to half of the square's width and height, you'll end up drawing a square that looks like it has been rotated around its central point:


The rotate transformation is likely the hardest of them all to understand fully. It's important to remember that transformations are performed on the entire 2d rendering context, and, if you want to rotate a shape around its central point, you'll need to combine rotate with translate.
Let's move onto something a bit more visually impressive.
Adding Shadows
Adding shadows to objects is delightfully simple.
Canvas comes supplied with a few properties for manipulating the appearance of the objects that are drawn on it, and one set of these properties allows you to add shadows.
Adding shadows to objects is delightfully simple. It simply requires the shadowColor property to be set on the 2d rendering context to a colour that isn't transparent black, and either of the shadowBlur, shadowOffsetX, or shadowOffsetY properties to be set to a value other than 0.
Try out the following code:
1 |
ctx.save(); |
2 |
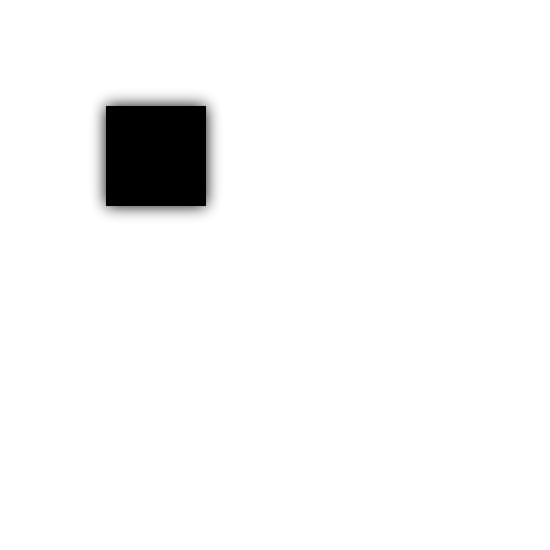
ctx.shadowBlur = 15; |
3 |
ctx.shadowColor = "rgb(0, 0, 0)"; |
4 |
ctx.fillRect(100, 100, 100, 100); |
5 |
ctx.restore(); |
This will give the shadow a fifteen pixel blur, and will set the colour to solid black:

Pretty standard stuff so far.
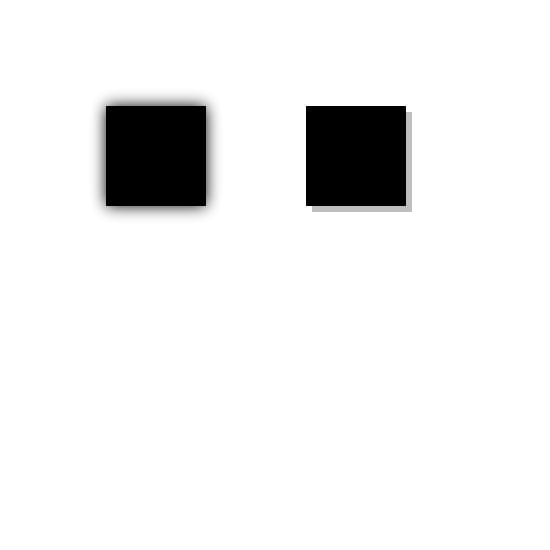
If you set the shadowBlur to 0, change the shadowColor to a light grey, and give a positive shadowOffsetX and shadowOffsetY:
1 |
ctx.save(); |
2 |
ctx.shadowBlur = 0; |
3 |
ctx.shadowOffsetX = 6; |
4 |
ctx.shadowOffsetY = 6; |
5 |
ctx.shadowColor = "rgba(125, 125, 125, 0.5)"; // Transparent grey |
6 |
ctx.fillRect(300, 100, 100, 100); |
7 |
ctx.restore(); |
You'll end up with a solid shadow that appears slightly to the right and below the object that has been drawn:

As cool as shadows are, they can be a bit of a resource hog.
It's important to remember that shadows affect everything that is drawn after they are defined, so it's useful to use the save and restore methods to save you from having to reset the shadow properties once you've used them.
Keep in mind that performance can suffer when you're applying a shadow to lots and lots of objects at the same time. In some cases, it might be worth using a PNG image with a shadow instead of drawing an object manually and applying a dynamic shadow using code. We'll cover how to use images with canvas in the next installment of this series.
Creating Gradients
You can create two types of gradients in canvas - linear and radial.
The last features that I want to cover with you in this tutorial are gradients. There are two types of gradients in canvas, the first being linear (straight) gradients. You can create a linear gradient using the createLinearGradient method (surprisingly enough), which looks like this in pseudo-code:
1 |
ctx.createLinearGradient(startX, startY, endX, endY); |
The first set of two arguments are the x and y position of the start of the gradient, and the second set of arguments are the x and y position of the end of the gradient. It's also important to point out that a gradient in canvas is actually a type of colour value, so you apply them to the fillStyle and strokeStyle properties.
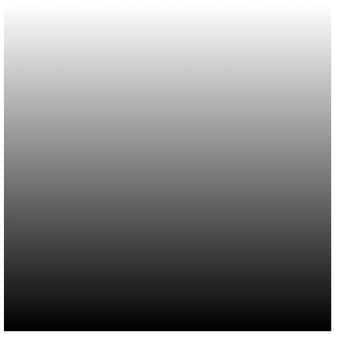
Here is an example of how to create a linear gradient that runs from the top of the canvas, all the way to the bottom:
1 |
var gradient = ctx.createLinearGradient(0, 0, 0, canvas.height); |
2 |
gradient.addColorStop(0, "rgb(255, 255, 255)"); |
3 |
gradient.addColorStop(1, "rgb(0, 0, 0)"); |
4 |
|
5 |
ctx.save(); |
6 |
ctx.fillStyle = gradient; |
7 |
ctx.fillRect(0, 0, canvas.width, canvas.height); |
8 |
ctx.restore(); |
Notice how you assign the gradient to a variable, then use that variable to call the addColorStop method. This method allows you to set the colour at particular points along the gradient. For example, the position 0 would represent the start of the gradient (the first x and y position), and 1 would represent the end of the gradient (the second x and y position). You can also use decimal points between 0 and 1 to assign a colour at a different point along the gradient, like 0.5 would be half way along.
By applying the gradient variable to the fillStyle property, you end up with a nice gradient that goes from white (at position 0 at the top of the canvas), to black (at position 1 at the bottom of the canvas):

But you don't always have to use linear gradients; you can also create radial gradients!
Radial gradients are created with the createRadialGradient method, which looks like this in pseudo-code:
1 |
ctx.createRadialGradient(startX, startY, startRadius, endX, endY, endRadius); |
The first set of three arguments are the x and y position as well as the radius of the circle at the start of the gradient, with the final three arguments representing the x and y position as well as the radius of the circle at the end of the gradient.
Sound confusing, right? It is a bit, so let's jump in and create a radial gradient to see what happens:
1 |
var gradient = ctx.createRadialGradient(350, 350, 0, 50, 50, 100); |
2 |
gradient.addColorStop(0, "rgb(0, 0, 0)"); |
3 |
gradient.addColorStop(1, "rgb(125, 125, 125)"); |
4 |
|
5 |
ctx.save(); |
6 |
ctx.fillStyle = gradient; |
7 |
ctx.fillRect(0, 0, canvas.width, canvas.height); |
8 |
ctx.restore(); |
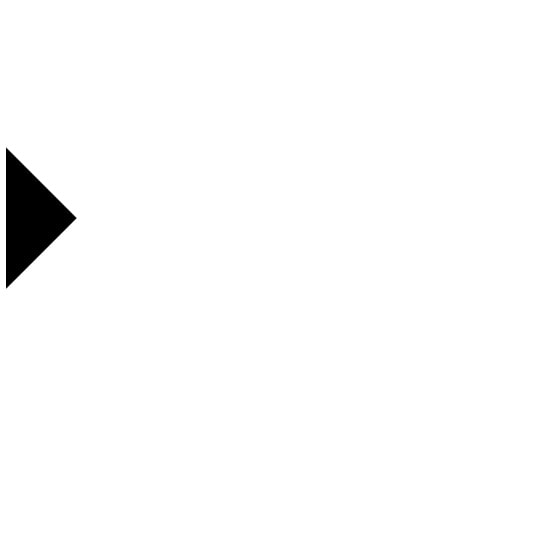
You've created a radial gradient that has a starting point at (350, 350) with a radius of 0, and an ending point at (50, 50) with a radius of 100. Can you guess what this will look like? 20 points if you guessed it would look like this:

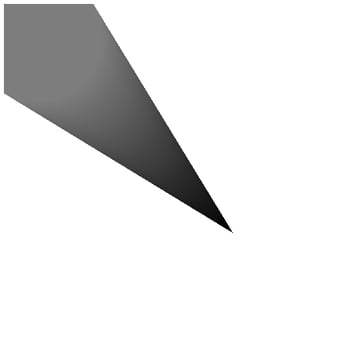
If you're anything like me, that's not what I expected to see. I've used radial gradients before in applications like Adobe Photoshop, and they look nothing like that! So why does it look like this then? Well, that's what it's meant to look like, weirdly.
Check out this diagram that depicts exactly how a radial gradient works in canvas:
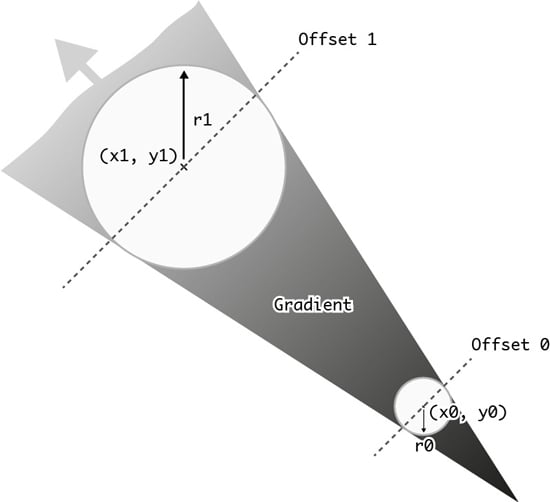

Interesting, isn't it? It basically allows you to create a cone shape, but what if you want to create a proper radial gradient like the one in Photoshop? Fortunately, it's simple.
Creating a proper radial gradient just requires you to place the two circles of the gradient at exactly the same x and y position, making sure that one of the gradient circles is larger than the other:
1 |
var canvasCentreX = canvas.width/2; |
2 |
var canvasCentreY = canvas.height/2; |
3 |
|
4 |
var gradient = ctx.createRadialGradient(canvasCentreX, canvasCentreY, 250, canvasCentreX, canvasCentreY, 0); |
5 |
gradient.addColorStop(0, "rgb(0, 0, 0)"); |
6 |
gradient.addColorStop(1, "rgb(125, 125, 125)"); |
7 |
|
8 |
ctx.save(); |
9 |
ctx.fillStyle = gradient; |
10 |
ctx.fillRect(0, 0, canvas.width, canvas.height); |
11 |
ctx.restore(); |
The code above creates a radial gradient that sits at the centre of the canvas. One of the circles in the gradient has a radius of 0, while the other has a radius of 250. The result is a traditional radial gradient that travels from the centre of the canvas outwards, like so:
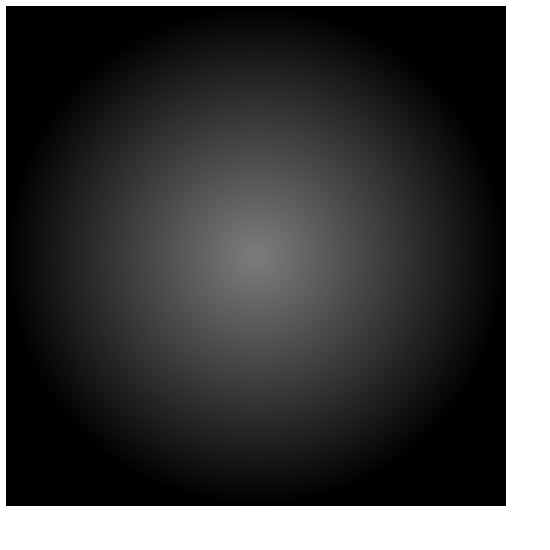

That looks better! I was honestly amazed when I saw how radial gradients were implemented in canvas. I bet it's tripped a lot of people up when they see that cone shape. Oh well, at least you know how to create proper ones now.
It's worth pointing out that gradients in canvas are also quite intensive operations. If you want to cover the entire canvas in a gradient, I'd first consider applying a CSS3 gradient background to the canvas element itself.
Wrapping Up
In this article, we reviewed how to perform basic transformations on the canvas, including translations, scaling, and rotation. You also learned how to add shadows to objects, and how to create gradients. It doesn't sound like like much, but transformations, in particular, form the backbone of some of the coolest stuff that can be achieved in canvas.
In the next entry in "Canvas from Scratch", we're going to break away from drawing objects and take a look at how to manipulate images and video in the canvas. This is where things start to get really interesting! Stay tuned!